Guides
How to Take a Passport Photo at Home in 2026 (Step-by-Step Guide)
Key takeaways
- Any phone from the last few years takes a high-enough-resolution passport photo.
- Use soft, even window light at 45° — never overhead lighting that casts shadows.
- Stand 1.5–2 metres from a plain, light-coloured wall.
- The US (since Nov 2016) and India (since Sept 2025) ban glasses; the UK strongly discourages them.
- Most rejections come from the wrong background colour, shadows, or head size.
Getting a passport photo rejected costs you time, money, and sometimes a missed travel date — and most rejections happen for reasons you could have fixed in thirty seconds. The good news: you don't need a studio. With a phone you already own and a few minutes of setup, you can shoot a photo that meets the same ICAO standards used by passport authorities in 60+ countries.
This guide walks through exactly what to do: the gear, the lighting, the pose, the country-by-country size rules, and the seven mistakes that get photos bounced. If you'd rather skip the measuring and cropping entirely, you can upload a photo to OneSnapID and preview a compliant result for free before you decide anything.
What do I need to take a passport photo at home?
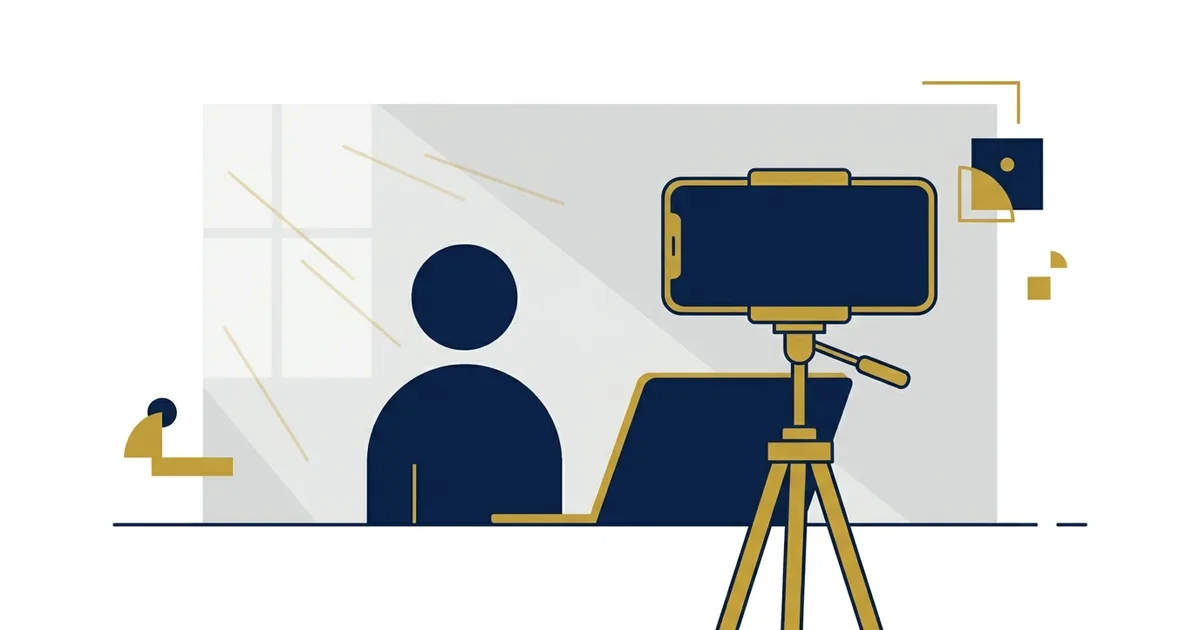
You only need four things to take a passport photo at home: a smartphone from the last few years, a plain light-coloured wall, soft natural light from a window, and a top that contrasts with the background. No professional camera or studio is required for a compliant result.
Here's the short equipment list and why each one matters:
- A phone (iPhone 11+ or a recent Android). Modern phone cameras easily exceed the ~600×600 px resolution most passports need. Use the rear camera, not the selfie cam.
- A plain wall. White works for most countries; the UK wants light grey or cream. Avoid textured walls, doors, and anything with a pattern or shadow line.
- Natural window light.Soft daylight is the single biggest quality factor. It's free and far more flattering than a ceiling bulb or flash.
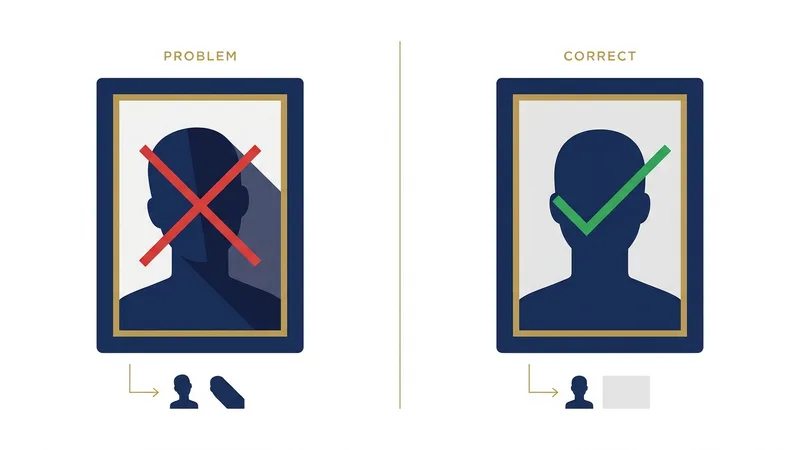
- Contrasting clothing.Wear a plain, darker top against a white wall so your shoulders don't blend into the background — that blend is a common cause of rejection.
- A tripod or a stack of books (optional). Anything to prop the phone at eye level so you can use the timer instead of shooting a distorted arm's-length selfie.
How do I take a passport photo at home, step by step?
To take a passport photo at home, stand 1.5–2 metres in front of a plain wall in even window light, square your shoulders to the camera with a neutral expression, frame your head with a little space above it, and use a 3-second timer to shoot 5–10 frames before picking the sharpest.
- 1
Position yourself 1.5–2 metres from the wall
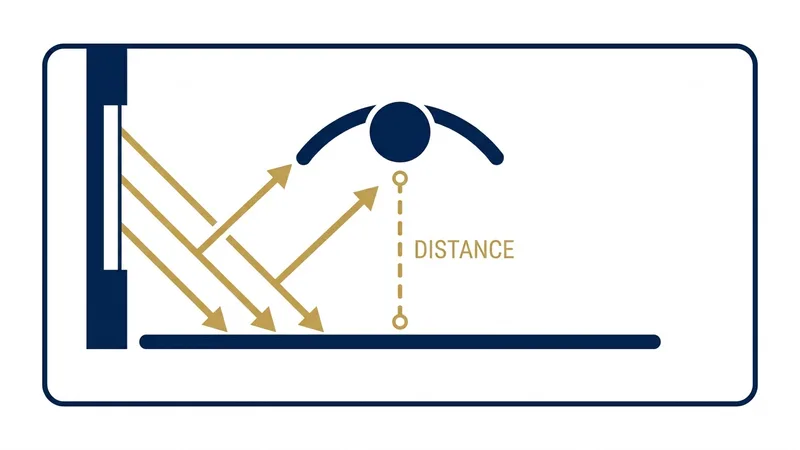
Stand 1.5–2 metres in front of a plain, light-coloured wall. This distance keeps the wall out of focus and prevents your shadow from falling onto it.
- 2
Set up even, soft lighting
Face a window so soft daylight hits you head-on, or sit at 45° to it. Avoid overhead ceiling lights, which cast shadows under the eyes and nose.
- 3
Pose correctly
Square your shoulders to the camera, keep a neutral expression with your mouth closed, and look straight into the lens with both eyes open.
- 4
Frame your head with space above it
Centre your face and leave a small margin of empty space above your head. Your head and the top of your shoulders should fill most of the frame.
- 5
Use a 3-second timer
Set a 3-second self-timer (or have someone else shoot) so pressing the shutter doesn't shake the phone or pull your shoulder out of position.
- 6
Take 5–10 photos and pick the sharpest
Shoot several frames and choose the sharpest one where your eyes are open, the lighting is even, and there are no shadows behind you.
- 7
Check for common issues before you finish
Zoom in and check for glare on glasses, red-eye, shadows, blur, or a tilted head. Re-shoot now while everything is still set up.
A few phone-camera settings make a real difference. Turn offportrait or “beauty” modes — the artificial background blur and skin smoothing they add are treated as edits and can fail an automated check. Turn off the flash, keep HDR on auto so the exposure is even, and hold the phone at your eye level rather than tilting it up or down, which distorts the face. Frame fairly wide and crop afterwards instead of zooming in, because digital zoom throws away detail. If your phone offers a grid, use it to keep your eyes level and your head centred. These small choices remove the most common technical reasons a home photo looks “off” to a reviewer.
Once you have a sharp, evenly lit shot, the remaining work is technical: cropping to the exact size, hitting the right head-height ratio, and cleaning up the background. That's the part OneSnapID automates— it measures your face and crops to your country's spec in seconds.
What lighting works best for a passport photo?
Soft, even, frontal light is best — ideally indirect daylight from a large window. Face the window, or sit at 45° to it, so light wraps evenly across your face. Avoid overhead ceiling lights and direct flash, which cast shadows under the eyes, nose, and chin that get photos rejected.
The single biggest quality factor in a home passport photo is light, and the cheapest good light is an overcast sky. Diffused daylight from a north-facing window — or any window on a cloudy day — is soft enough to avoid hard shadows. If one side of your face is darker, add a second window or hold a white card on the shadow side to bounce light back. Never use your phone's flash: it causes red-eye, flattens your features, and throws a hard shadow onto the wall behind you. Keep the light colour consistent too — mixing warm bulbs with cool daylight tints your skin unevenly, which some automated checks flag. Shoot during the day, a step or two back from a plain wall, and confirm no shadow falls behind your head before you commit to a frame.
What background colour is required for different countries?
Most countries require a plain white background, but the UK asks for light grey or cream, and the Schengen area accepts light grey or off-white. Whatever the colour, it must be plain, evenly lit, and free of shadows, patterns, or objects. Match your country's exact requirement before you shoot.
A common, avoidable failure is using a pure-white wall for a UK passport photo, which actually wants a light grey or cream backdrop so the scanner can find your head outline. The US passport photo, by contrast, requires plain white. To get an even background, stand 1.5–2 metres in front of the wall so your shadow falls to the floor, not the wall, and light the wall as evenly as your face. Wear a top that contrasts with the background — a darker colour against white — so your shoulders don't blend in, another frequent rejection cause. If you can't find a clean wall, OneSnapID replaces and evens out the background to your country's exact colour automatically.
Can I wear glasses in a passport photo?
It depends on the country. The US (since November 2016) and India (since 2025) no longer allow glasses. The UK advises removing them unless medically necessary. The Schengen area, Canada, and Australia permit glasses only if your eyes are fully visible, with no glare and frames that don't cover them.
This is the rule most people get wrong, because it isn't universal. The US State Department banned eyeglasses in passport photos on 1 November 2016 after glare and frames caused widespread identification problems, and India tightened its rule in 2025. Where glasses are still allowed — for a Schengen visa photo or a Canada passport photo — the lenses must be clear (no tint), the frames must not cover the eyes, and there must be zero glare, which is hard to guarantee at home. Because a single reflection means rejection in every country, the safest choice almost everywhere is simply to take your glasses off for the shot.
What size should a passport photo be by country?
Passport photo requirements vary by country: the US wants a 2×2 inch (51×51 mm) photo on a white background, while the UK, Schengen area, and India commonly use 35×45 mm. Size, background colour, glasses rules, and how recent the photo must be all differ — check your country before you shoot.
| Country | Size | Background | Glasses | Recency |
|---|---|---|---|---|
| United States | 2×2 in (51×51 mm) | White | Not allowed (since 2016) | 6 months |
| United Kingdom | 35×45 mm | Light grey / cream | Not allowed | 1 month |
| Schengen (EU) | 35×45 mm | Light grey / white | Allowed (no glare) | 6 months |
| India | 2×2 in / 35×45 mm | White | Not allowed (since 2025) | 6 months |
| Saudi Arabia | 40×60 mm (passport) / 51×51 mm (visa) | White | Allowed | 6 months |
| Canada | 50×70 mm | White / light grey | Allowed (no glare) | 6 months |
| China | 33×48 mm | White | Allowed (no glare) | 6 months |
| South Korea | 35×45 mm | White | Allowed (no glare) | 6 months |
| Australia | 35×45 mm | White / light grey | Allowed (no glare) | 6 months |
| Turkey | 50×60 mm | White | Allowed (no glare) | 6 months |
| Japan | 35×45 mm | White / light grey | Allowed (no glare) | 6 months |
These rules change, so always confirm against the official source — for example the US State Department photo guidelines, the UK's gov.uk passport photo rules, or India's official passport portal. OneSnapID keeps the exact spec for each of 60+ countries built in, so the crop and background always match the current requirement.
A few patterns help you remember the table. Most of Europe and the Commonwealth — the United Kingdom, the Schengen area, Australia, India, South Korea and Japan — share the 35×45 mm format, so one correctly-shot photo often works across them with only a background tweak. North America is the outlier: the United States and Canada use larger formats (51×51 mm and 50×70 mm), and the US is unusually strict on the 50–69% head-height ratio. The Gulf states vary, which is why Saudi Arabia uses 40×60 mm for passports but 51×51 mm for visas. When in doubt, the size and head-height ratio matter more than anything else — get those right and most other adjustments are cosmetic.
Why do passport photos get rejected?
Most passport photos are rejected for a handful of avoidable reasons: the wrong background colour, glasses, shadows on the face or wall, an incorrect head-size ratio, or a non-neutral expression. Knowing these in advance lets you fix them while the camera is still set up.
- Wrong background colour. A frequent UK rejection is using a white background instead of the required light grey. Match the exact colour your country asks for.
- Glasses. The US (since 2016) and India (since 2025) no longer allow them; elsewhere glare on the lenses is an instant fail. Removing glasses is the safe choice.
- Shadows. A shadow on your face or behind you on the wall — usually from overhead light — is one of the top reasons photos bounce. Even, frontal light fixes it.
- Wrong head-size ratio.Your head must fill a specific portion of the frame (e.g. 50–69% for the US). Too zoomed in or out and it's rejected.
- Wrong file format or size.Online portals like India's e-Visa enforce strict JPEG dimensions and kilobyte limits; the wrong export silently fails.
- AI-enhanced or beautified photos. The US State Department flags digitally altered faces. Filters, smoothing, and AI portraits are rejected — only framing and background may be adjusted.
- Smiling or a non-neutral expression. Mouth closed, both eyes open, relaxed face. A toothy smile or raised eyebrows will get the photo sent back.
Want the full breakdown with the fix for each one? See why passport and visa photos get rejected — it covers all ten reasons, the digital file limits that fail online uploads silently, and a pre-submission checklist.
Can I take a baby's passport photo at home?
Yes. A baby's passport photo follows the same plain-background, neutral-expression rules, but the expression rule is relaxed — a slightly open mouth or imperfect gaze is usually accepted. Lay the infant on a plain white sheet and shoot straight down; no hands, toys, dummies, or other people may appear in the frame.
Newborns can't hold their heads up or pose, so most authorities — including the US State Department and HM Passport Office — accept a photo taken from directly above while the baby lies on a plain white sheet or blanket. Make sure no shadows fall across the face, the eyes are open if possible, and nothing else (a hand, a pacifier, a car-seat strap) is visible. A handy trick is to lay a white blanket inside a car seat or bouncer and photograph from straight above. The same size and head-position rules as adults still apply, so framing matters — a tool that auto-crops to the country spec saves a lot of trial and error with a wriggling infant.
How do I print a passport photo correctly?
Print at the exact physical size — 2×2 inches for the US, 35×45 mm for the UK and most of Europe — at 300 DPI on photo paper, never plain paper. Many countries also accept a digital upload instead. A single 4×6-inch print can hold several cut-out copies to save money at a kiosk.
Resolution and paper are what trip people up. A passport photo should be printed at 300 DPI or higher; printing a low-resolution file makes the face soft and gets it rejected. Use a photo lab, pharmacy kiosk, or photo printer with genuine glossy or matte photo paper — standard office paper won't pass. To save money, place two to six correctly-sized photos on one 4×6-inch (10×15 cm) sheet and cut them out precisely, keeping the head centred. If you're applying online — for an e-visa or a renewal — you usually upload a digital JPEG that meets the pixel and file-size limits instead. OneSnapID exports both a submission-ready digital file and a print-ready 4×6 and A4 sheet, so either route is covered.
Should I use an online tool or crop the photo myself?
Doing it manually works if you can measure head ratios and crop to exact millimetre sizes; otherwise an online tool like OneSnapID is faster and safer. OneSnapID checks compliance, crops to your country's exact spec, replaces the background, and lets you preview the result before paying.
The photography is the easy half. The half that gets people rejected is the precise output: a 2×2 inch crop at 300 DPI, a head that fills exactly the right percentage of the frame, a perfectly even background, and a file that fits a portal's size limits. Measuring that by hand in an image editor is slow and error-prone.
Here's what OneSnapID does with the photo you just shot:
- Detects your face and crops to the exact size and head ratio for your country.
- Replaces and evens out the background to the required colour.
- Checks for compliance issues (expression, eyes, glasses) before you submit.
- Exports both a digital file and a print-ready 4×6 / A4 sheet.
- Shows you the finished photo first — you only pay if you're happy with it.
See your compliant photo before you pay
Upload a photo, preview the result for free. $5.99 only if you download.
Try the free preview →The bottom line
Taking a passport photo at home in 2026 comes down to three things: shoot in soft, even window light against a plain wall; keep a neutral, front-facing pose 1.5–2 metres back; and match your country's exact size, background, and glasses rules. Nail those and you avoid almost every rejection.
The details are where applications fail, and they differ by country: the United States bans glasses and wants plain white, the United Kingdom needs light grey and a photo under a month old, and online portals such as India's e-Visa enforce strict JPEG file-size limits. Underpinning all of them is the same ICAO biometric standard, which is why a single, well-lit, correctly-cropped photo can be re-sized for almost any country. The technical part — the exact crop, the head-height ratio, the even background, the file that fits a portal's limits — is precisely what trips people up, and precisely what a tool can automate in seconds.
If you'd rather not measure pixels and millimetres, let OneSnapID handle the technical side — upload your photo and preview a compliant result for free. Have a specific document in mind? Jump straight to the US passport photo, UK passport photo, or Schengen visa photo page.
Frequently asked questions
Can I use my iPhone for passport photos?
Yes. Any iPhone from the iPhone 11 onward (and most Android phones from the last few years) shoots far more resolution than a passport photo needs. Use the rear camera, natural light, and a plain background for the best result.
What's the best lighting for a passport photo at home?
Soft, even daylight from a window is best. Face the window or sit at 45° to it so light falls evenly across your face. Avoid overhead ceiling lights and direct flash, which create shadows under the eyes, nose, and chin.
Why was my passport photo rejected?
The most common reasons are the wrong background colour, shadows on the face or wall, wearing glasses where they're banned, an incorrect head-size ratio, or a non-neutral expression. Wrong file size or format is a frequent cause for online applications too.
How recent does a passport photo need to be?
Most countries require a photo taken within the last 6 months. The UK is stricter and asks for one taken within the last month. If your appearance has changed significantly, take a new photo regardless of the date.
Can I smile in a passport photo?
No. Almost every country requires a neutral expression with your mouth closed and both eyes open. A natural, relaxed face is fine — but a smile that shows teeth or changes your eyes will usually get the photo rejected.
Do I need a professional photographer?
No. A modern phone, a plain wall, and good window light produce a fully compliant photo. The hard part is the exact cropping, head ratio, and background — which a tool like OneSnapID handles automatically once you upload a clear shot.
Can I wear glasses in a passport photo?
It depends on the country. The US (since Nov 2016) and India (since Sept 2025) ban glasses; the UK strongly discourages them unless medically required. The Schengen area, Canada, and Australia allow them only if your eyes are fully visible with no glare or frames covering them. When in doubt, take them off.
What background colour should a passport photo have?
Most countries require a plain white background, but the UK asks for light grey or cream, and some accept off-white. Whatever the colour, it must be plain, evenly lit, and free of shadows, patterns, or objects.
How much does an online passport photo cost?
OneSnapID lets you preview your compliant photo for free and only charges $5.99 if you want the final, watermark-free download — far less than most photo studios, with digital and print-ready sheet formats included.
Can I take a passport photo by myself with a selfie?
You can, but a front-camera selfie at arm's length distorts your face and is often rejected. It's better to prop the phone up, use the rear camera and a 3-second timer, and stand back 1.5–2 metres for natural proportions.
What size should a passport photo be?
It varies: the US uses 2×2 inches (51×51 mm), while the UK, Schengen area, and India commonly use 35×45 mm. Always confirm the exact size, head height, and background for your specific country before submitting.
Are AI-edited or beautified passport photos allowed?
No. Authorities such as the US State Department now detect and reject digitally altered or AI-generated faces. OneSnapID only adjusts framing, size, and background — it never changes your facial features, so your photo stays acceptable.
How many passport photos do I need?
Most paper applications ask for two identical prints, while online and renewal applications usually need a single digital upload. Check your specific country's form — the US requires one 2×2 inch photo, and the UK accepts a digital code or one printed photo.
What file format and size do online passport applications need?
Almost all portals require a JPEG. Pixel and file-size limits vary: the US digital photo must be at least 600×600 pixels, while India's e-Visa enforces a tight kilobyte range. Exporting at the wrong size is a common silent rejection, so match the portal's stated limits exactly.
Is a digital passport photo accepted, or do I need a print?
Both are common. Online applications and renewals usually take a digital JPEG, whereas in-person submissions want printed photos on photo paper. OneSnapID gives you both a digital file and a print-ready sheet so you're covered either way.
How long does a passport photo stay valid?
Most countries require a photo taken within the last 6 months, and the UK asks for one taken within the last month. There's no fixed expiry once submitted, but if your appearance changes significantly, take a fresh photo regardless of the date.